Along the same lines, you could also install a custom recovery like TWRP. There are a plethora of reasons why you would need this recovery. To begin with, you could easily flash ZIP and IMG files, create and restore Nandroid backups or delete various device partitions, Likewise, you could also mount external devices or use advanced functions such as the TWRP file manager or even its handy command-line interface. However, there do exist some risks if you don’t flash this recovery in the right manner. More often than not, you might end up in a bootloop or a soft brick device right after flashing the TWRP Recovery. And this was and has always been among the most recurring issues for various Android devices. if you are also getting bugged with this, then you have come to the right place. In this guide, we will explain to you the reasons as well as the steps to fix the soft brick or bootloop issue after installing the TWRP Recovery. Follow along.
Fix Magisk Module Bootloop without TWRP RecoveryFix Magisk patched boot.img issue while Rooting Android 11How to Pass Magisk SafetyNet on Rooted Android 11How to Fix Android Device stuck in Fastboot Mode
Reason for Soft Brick or Bootloop after installing TWRP Recovery
Right since the inception of A/B partition devices, issues related to the flashing of TWRP has skyrocketed. Since A/B devices no longer have a dedicated recovery partition, hence you need to boot it to the boot partition and then flash it. Whereas on the other hand, A-only devices still have the recovery partition and hence TWRP could directly be flashed. However, not many users seem to be aware of whether their deivce is an A/B partition or is A-only. As a result, they end up using the incorrect command to flash the recovery which results in the corrupt boot partition. [Read: TWRP: fastboot flash vs fastboot boot: Which command to use]. The other reason is the inability of TWRP to decrypt the data partition and hence access the data stored on your device. This issue is mostly linked with unofficial TWRP builds but there have been a few instances of users facing the error with official builds as well. [Read: How to Fix TWRP 0MB Internal Memory Issue]. Along the same lines, flashing the incorrect build is among the most common cause as well. Nowadays, most devices have a Pro, Super, Max, Ultra, and tons of other variants. So incorrect flashing of TWRP has been noticed quite a few times. [Read: How to Fix TWRP Error 7 (While Flashing Custom ROM via TWRP)]. Furthermore, in some cases, the DM Verity Encryption could also cause a few issues. With that said, given below are the various methods to rectify all these issues. This in turn will help you fix the soft brick or bootloop issue after installing the TWRP Recovery. [Read: Disable DM-Verity or Android Verified Boot without TWRP].
How to Fix Soft brick/Bootloop after installing TWRP Recovery
There is no universal fix as such. You will have to try out each of the below-mentioned fixes until you are able to achieve success. Furthermore, if you are able to boot to TWRP, then take a Nandroid backup and then transfer it to a safer place (SD Card, USB OTG, PC, etc). With that said, let’s now get on with the guide to fix the soft brick or bootloop issue after installing the TWRP Recovery. Droidwin and its members wouldn’t be held responsible in case of a thermonuclear war, your alarm doesn’t wake you up, or if anything happens to your device or data by performing the below steps.
Fix 1: Reverify the Downloaded TWRP File
One of the most command reasons seems to stem out from the fact that users might have unintentionally downloaded the incorrect TWRP Recovery. Now that every single device comes in three-four variants (Max, Pro, Ultra, etc), the issue becomes all the more prominent. So the best fix, in this case, is to verify the device codename.
Each device comes with a unique name. Fortunately, TWRP uploads all the recovery files corresponding to the device code-name, so there shouldn’t be an issue on that end. Just reverify your device code name and download and flash the TWRP file accordingly. See if it is able to fix the soft brick or bootloop issue after installing the TWRP Recovery.
Fix 2: Flash No-Verity-Opt-Encrypt
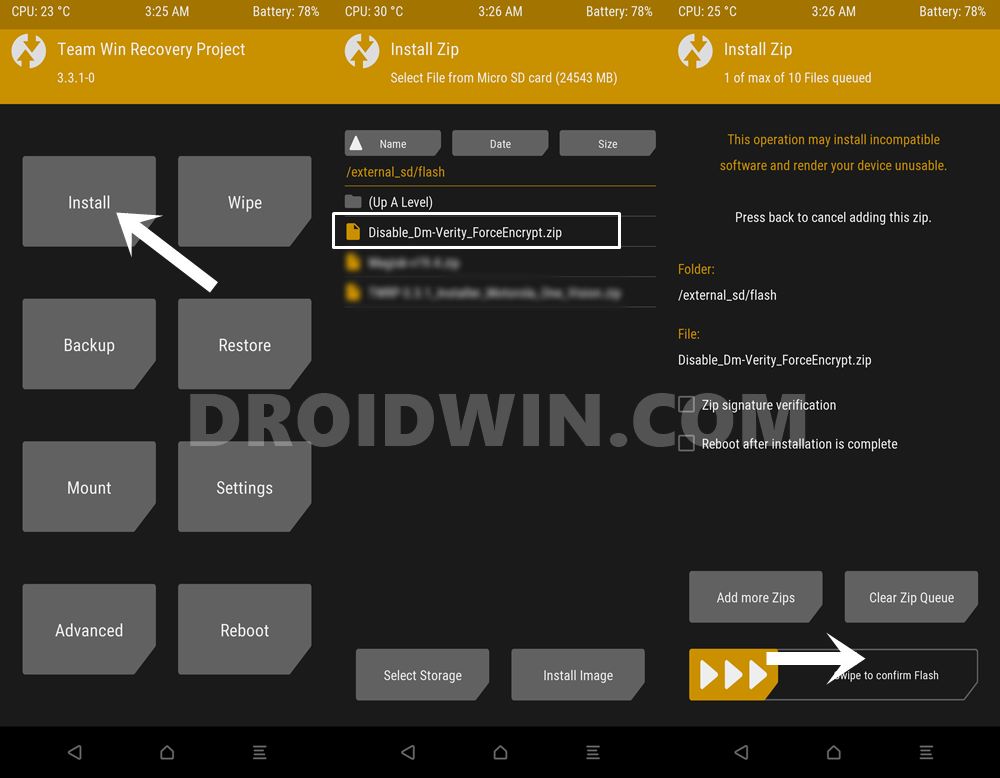
Your Android deivce has the data partition encrypted by default. This is done to prevent unauthorized access to the data stored on your device. While this is all well and good, the real issue arises in accessing the data via a custom binary file such as TWRP. And there is only a handful of TWRP Recoveries that are able to decrypt the data partition on the go. For others, you will have to take alternate routes. This involves two different approaches. The first one is the less drastic one and we have shared it here. The second one takes a more extreme step and hence we have shared that after a few fixes. With that said, if we focus on this fix, then it requires you to flash the no-verity-opt-encrypt (some also calls it by the name Disable_DM-Verity_ForceEncrypt). The steps to flash this file is as follows:
Fix 3: Flash Magisk Installer ZIP
While Magisk’s primary focus still stands the ability to root your device, but that isn’t its only focus. It also holds a plethora of other useful functionalities. Two of them are the passing of the safety net test and decryption of data partition. While I haven’t really tested the latter one, but there are have been many users who were able to fix the TWRP Bootloop issue by flash Magisk. However, before you do so, make sure you completely understand the risk of rooting. Apps like Google Pay and the likes might not function as expected [FIX: How to Pass Magisk SafetyNet on Rooted Android 11] Likewise, you might no longer receive OTA updates [Fix: How to Install OTA Updates in Rooted Android Device. If that is all well and good, then here are the required steps to flash Magisk Installer ZIP via TWRP.
Fix 4: Format Data via TWRP
Well, we have already shared two different methods to decrypt the data partition. The first one was via flashing the no-verity-opt-encrypt.zip while the second one requires flashing of Magisk ZIP. However, in some instances, both these methods might not be able to give out desirable results. If that happens, then the only method forward is to format the data partition via TWRP. This will remove all the data from your device and at the same time, remove the encryption as well. Follow along for the instructions:
Unbrick Motorola and Fix Start Up Failed without using Lenovo Motorola Smart AssistantRestore Pixel 3/3 XL/3a/3a XL to Stock Firmware via Fastboot | Unbrick itHow to Boot any (Bricked/Unbricked) Android Device to EDL ModeBoot Realme Devices to EDL Mode (3 Methods) | Unbrick ItHow to Root Android Devices Without TWRP Recovery
Fix 4: Flash Stock Boot.img via TWRP Recovery
If none of the aforementioned methods managed to spell out success in your case, then you might have to switch back to stock. It might be the case that the TWRP Recovery might have a few bugs that the developers are trying their best to fix. Or the boot partition on your device has been corrupted as a result of flashing an incorrect binary. So the best bet is to revert to stock and wait for a few days before flashing the TWRP, In the meantime, at least the bootloop will be fixed and your device will be up and running.
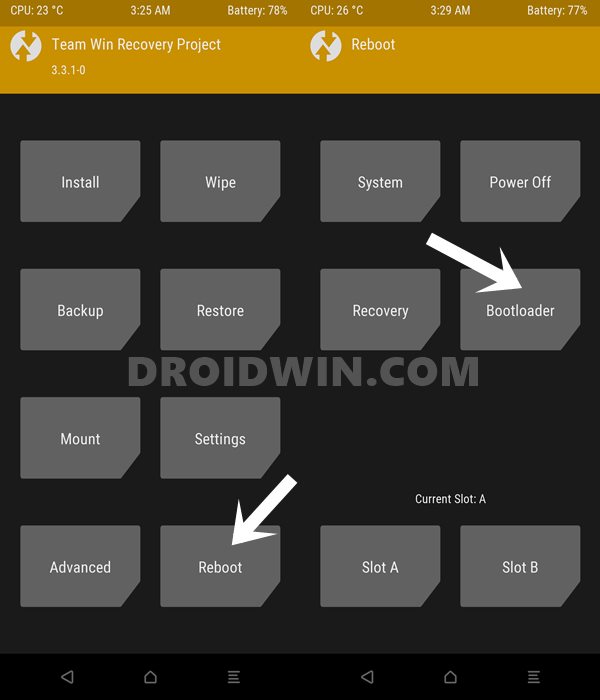
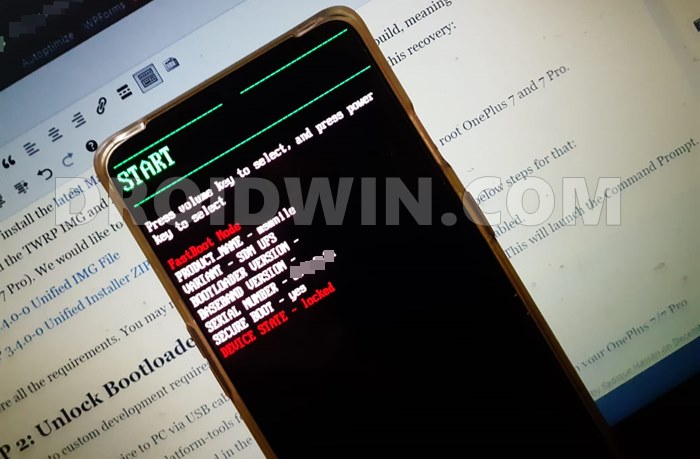
With that said, this method is only for A/B partition devices. This is because only these sets of devices use the boot partition to flash the recovery file. [The A-only devices still have the recovery partition to flash the TWRP]. So first off, verify if your device is A/B Partition or not using this guide: . If it is indeed A/B, then proceeded with the steps to flash the stock boot.img. However, if it turns out to be A-only, then refer to the steps to flash the stock recovery.img file.
Flash Stock Boot.img via TWRP [For A/B Devices]
Download the stock boot.img for your device. Do keep in mind that you should only download the boot.img corresponding to your currently installed ROM as well as the current firmware version [Build Number]. If you are on a stock ROM, then the following guides might help you out:
How to Extract payload.bin and get the stock boot image fileExtract Stock Boot.img from OnePlus OxygenOS Stock ROMHow to Extract OZIP Realme Stock ROM (Firmware)
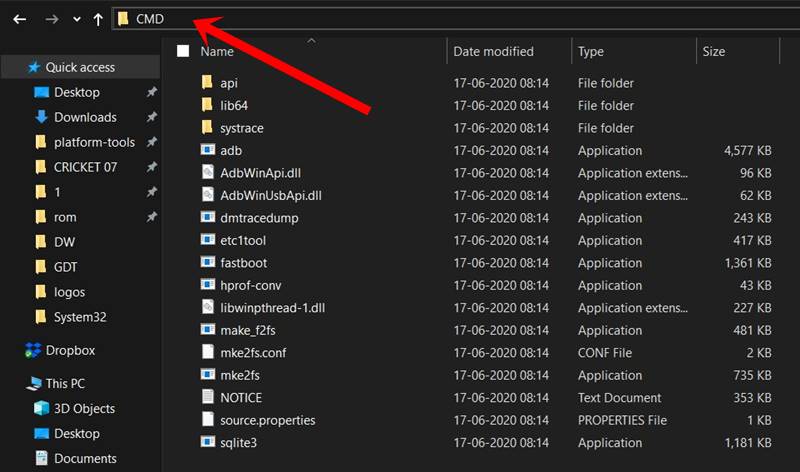
Once you have got the stock boot.img file, proceed with the below steps to install it onto your device:
Flash Stock Recovery.img via TWRP [For A-only Device]
Tio begin with, get hold of the stock recovery file via any of the following guides given below (while the given guides focus on stock boot.img, but you will also get other partition files, including the recovery.img):
How to Extract payload.bin and get the stock boot image fileExtract Stock Boot.img from OnePlus OxygenOS Stock ROMHow to Extract OZIP Realme Stock ROM (Firmware)
Once you get the stock recovery.img file, make sure to rename proceed with the below steps to flash it onto your device:
Fix 6: Reflash the Stock Firmware
If flashing just the stock boot.img or the recovery.img doesn’t managed to fix this issue, then you would probably have to completely reflash the custom ROM or stock ROM. In other words, reinstall the OS that you are currently using. In case of custom ROMs, well you should stick with the flashing instructions that the developers have provided. While you may proceed with the dirty flash, but it is recommended that you go ahead with a clean install (i.e formatting the data as well).
On the other hand, if you are on a stock ROM, then start off by unrooting your device{ [3 METHODS] Unroot any Android Device-Uninstall Magisk}. Likewise, also make sure to remove any mods or custom binaires that you have installed. Once that is done, refer to our detailed guide to How to Flash Stock Firmware via Fastboot Commands. Do so and the issue should be fixed. With this, we conclude the guide on how to fix the soft brick or bootloop issue after installing the TWRP Recovery. We have shared six different methods for the same. Do let us knwo in the comments which one managed to work out in your favor. Likewise, if you have any queries concerning the aforementioned steps, do let us knwo in the comments as well.
How to fix ADB Device not found [List of Devices Attached is blank]Detailed Steps to Fix adb is not recognized ErrorFix Unauthorized Device with ADB Commands [3 methods]How to Fix FAILED (remote: Command not allowed)How to Fix TWRP 0MB Internal Memory Issue
About Chief Editor


![]()